 |
| My back lawn this morning after artificial turf installation and a cleansing rain. |
Anyone who follows this blog (or who lives in my neighborhood) knows about the huge gardening risk (with the even larger payoff ) that I took last fall when I
installed artificial turf in my front yard. I wrote about the extensive decision process of choosing (a)
which synthetic turf product provided me the
most realistic look and feel, (b) what my priorities were in
artificial turf selection, and (c) the elaborate, labor intensive process it involves... in a blog post
here. Oh, and the company I used, and that I would HIGHLY recommend (and, no I don't get a kickback, LOL) is
NEXGEN LAWNS (here). You can follow them on
FB here (and yes, that is my house as their FB header. ) Since the the artificial turf in the front has been
such an incredible improvement in every way over my real turf, I decided to install it in the back as well......as soon as my thrifty self would allow.
 |
| Testing samples of turf options and blade density for the back yard. |
And that was this week.
 |
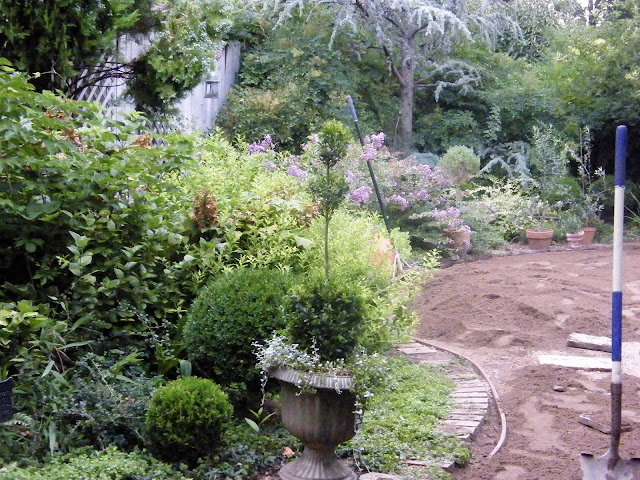
| How the back real grass turf looked this spring. Not unlike how the artificial turf appears now! |
Like my front landscape, the back had very little grass. The beds that border the turf are deep and the rather large 'entertainment' or deck area off of the kitchen door is gravel and flagstone. Once again, it is just a 'throw rug' of lawn......which I think is the perfect application for
NEXGEN LAWNS (here) artificial turf use. Like my front lawn, the back turf looked incredible in spring and fall...after considerable effort, watering, seeding, edging, mowing, and on and on. But as soon as those high temperature and humidity levels hit.........WHAM!!!! That turf raised the white flag of surrender and no coaxing or intervention could keep it alive and thriving, much less replicating its beautiful appearance in the spring and fall.
 |
| Removal of the struggling turf begins. |
Also like the front, I kept the same bedlines, the same stepping stone placement (this was one of my criteria for selection....whether or not the company and the product could work around the stepping stones---a signature feature in my garden, both practical and pretty), and the same appearance and contours of the edging.
 |
Turf removal is a labor intensive job; more exacting than you would think.
Basically, exactly how the real turf looked. NEXGEN (here) worked with me to get exactly the look and feel I wanted. I won't go into all the details of installation again....you can find them here, but between myself and the installers, we managed to get just the right, and realistic, look I wanted. Briefly, here was the installation process with one departure... |
 |
| And yes, it took a village. Of hard-working, sweaty, good-natured guys. And some good tunes on the radio. |
 |
| Existing brickwork and brick border was left undisturbed and in place. |
|
| Thankfully it rained the night before rendering turf removal much easier. |
After the turf removal, flexible edging was put in place using the old bed lines as a template. These guys were uber accommodating as I moved the edging an inch here and an inch there.
 |
| Edging is in place on west side! Workers survey the work thus far. |
 |
| Stakes hold the parabola of the curves in place. |
I made sure there was a void between the brick and the grass. This was very important to me...I think it enhances the realism of the synthetic turf, softens the look, and really mimics the way I have always trimmed, groomed and mowed my turf in the past. Aka, the 'signature' look in the garden I have worked hard to create. And, it just makes me pleased and happy with the overall appearance of the garden, no matter what the season.
 |
| Ground covers, like ajuga, golden moneywort, and golden oregano grow in gaps between the bricks. This too was left in place and softens the appearance overall. It also provides extra textural interest, and gives me more variety in things besides grass to grow. |
 |
| Large quantities of crushed gravel was brought in as the base to the synthetic turf. |
They then put down a layer of black porous weed barrier inside the edging. Here is where I made a departure from the front process of installing the grass. Rather than using the Airfield Systems (here) grass drainage system (if you want to see installation images of my front lawn, they used it as a case study on their website here) I opted to use gravel as the substrata to the turf. Largely because the area was so small and sinewy in a tight space.
 |
| Another labor intensive process: bringing large amounts of crushed gravel |
Copious amounts of first crushed gravel, then a slightly larger gravel were wheelbarrowed in and then shoveled and tamped and prodded into place. Again, with exacting detail. I was so impressed with their professionalism and craftsmanship.
 |
| Stepping stones are placed, leveled, and then 'graveled' in. |
I then, with their help, strategically placed the stepping stones where they had been before. We took pictures to ensure the look and cadence of the placement was the same.
 |
| Minor tweaking of the edging was not an issue for them; they were eager to please. |
Then with both manual and motorized tools the gravel was leveled and tamped into place making sure all was stable (particularly the stepping stones) and even under foot.

Quite honestly, after this step, it looked so good I was almost tempted to stop and just leave a gravel surface! Had I a different style home....where, I think, this look is amazing....I would do so.
 |
| The packed gravel looked so good I was tempted to leave it that way! |
 |
| Notice that the gravel is now level with the top of the edging, and border is tailored, crisp and neat. |
With the undergirding in place, they then laid the turf, and cut and trimmed it into place.
 |
| They thought I should at least help a bit by securing some of it in place...as I was so fascinated with the process. |
 |
| Cutting around the stepping stones is an exacting, slow, careful, methodical process |
As before, they carefully mimicked the look of the edges, then power brushed large amounts of sand into the turf to weigh it down and make the blades stand up. I am thrilled by the excellent drainage I will now enjoy......poor drainage always having been an issue in the past. An added benefit to the finished product........which looks spectacular. Examine the images below noting the real turf and the faux gras as Husband calls it. One can barely tell the difference. In fact, as I loaded these images it was very hard for me to tell what was real and what wasn't. Only the blooming borders provided the answer for me! The entire installation process took only two days.
 |
| After completion: artificial turf. |
 |
| After completion: artificial turf |
 |
| Real turf in early summer. I can hardly tell the difference! |
 |
| Real turf, late spring. |
 |
| After completion: synthetic turf, mid - late summer |
The biggest difference in the images isn't the turf, it's the quality of light when the photos were taken.


.
After on the left, before on the right.
Artificial on the left, real on the right.
No maintenance or water on the left.....water, seed, fertilizer, fungicides, mowing, edging, blowing and frustration on the right.
WHAT DO YOU THINK? TELL ME!
Thank you for taking time out of your busy schedule to stop by Potager! If you don’t want to miss a post, you can sign up to receive a daily email and you will never miss a thing. I’m also on Facebook, Pinterest, and Instagram.


